Work sections
Node section
You will see the node section under the “Connect Wallet” button. That is the space where all nodes you are able to create flows are located.
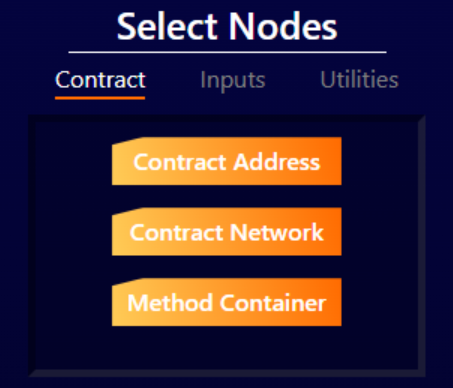
The nodes are grouped into three tabs:
Contract - This tab contains nodes related to operations on contracts
Inputs - Here you will find nodes that allow you to enter values and connect them to other nodes
Utilities - This tab includes nodes that allow you manipulate input data in different ways
You can drag these nodes to the workfield to open them and create your flow.
Method section
You will find the method section right after the node section. In this place you can load the ABI related to contracts you will be performing your operations on and select methods contained in it.
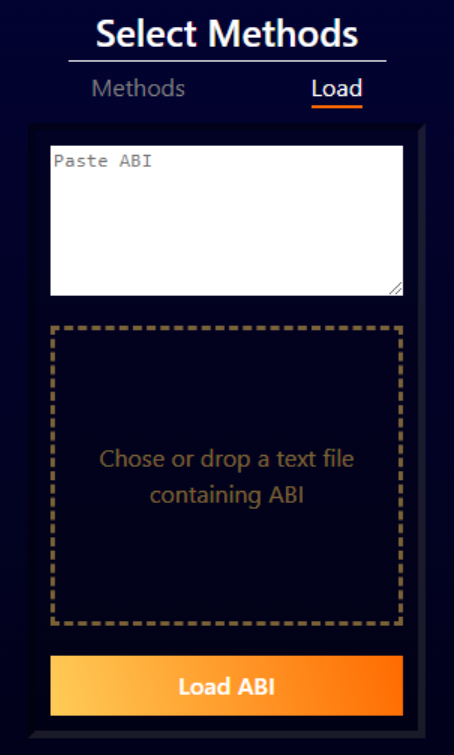
Two tabs are visible in this section. The “Load” tab, which is opened by default, allows you to load the ABI in json format by pasting it directly into the text box or selecting a text file from your device.
After loading the ABI, the “Methods” tab will automatically appear.
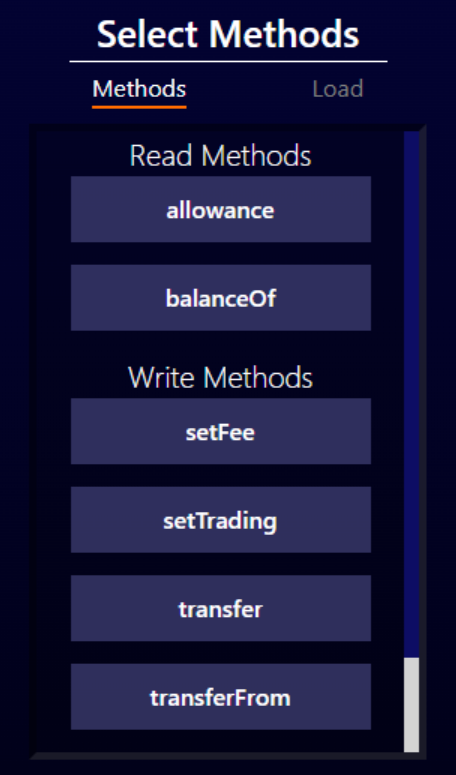
In this tab, you will see all the loaded methods from the selected ABI which will be categorized into two groups:
Read Methods - Here you will find methods to read data from a smart contract. Using these methods does not require a connected wallet.
Write Methods - Here you will find methods that require gas to call, for this reason you will not be able to call these methods without connecting your wallet.
Hovering the cursor over a method will display a hint box window telling you what input is required to call the method and what output you can expect from calling it.
You can load a new ABI at any time by going to the "Load" tab, but note that loading a new ABI will overwrite the old one, removing all methods from the current flow.
The workfield
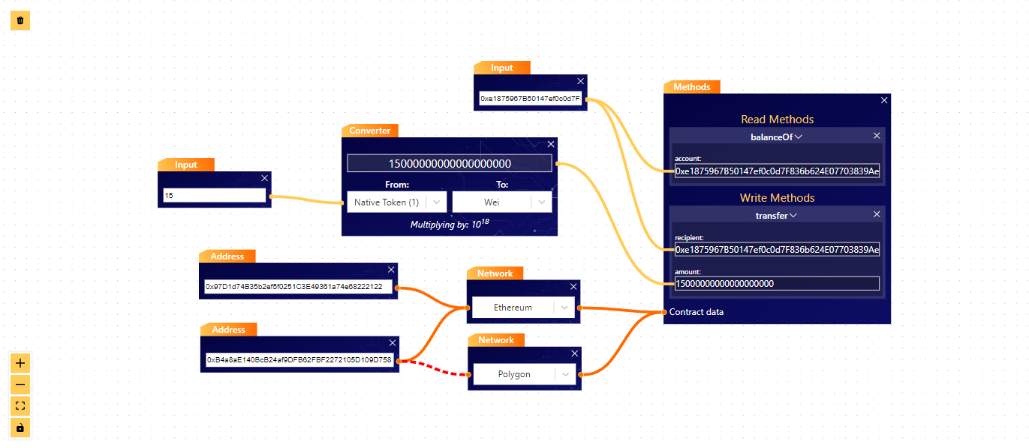
The workfield is the place where you are able to create your flows by dragging and connecting nodes, as well as methods.
You can easily move around the workfield by dragging it with the left mouse button. You are also able to adjust the zoom of the workfield using a mouse scroll.
You can also use icons in the bottom left corner of the workfield.

The plus (+) and minus (-) buttons work the same way as the scroll and can be used to adjust the zoom of the workflow. You can also see the “resize” button that will change the zoom to the maximum amount in which you can still see all the nodes. The “lock” button locks the workfield while preventing you from some interactions with nodes so that you can move it around more easily.

You can also see the “trashbox” icon in the top left corner. This one will allow you to clear the workflied by removing all nodes.
The results bar
The results bar at the bottom of the view is where the results of all the connections in the flow are displayed. Here you can see all contracts in all connected networks with all connected methods.
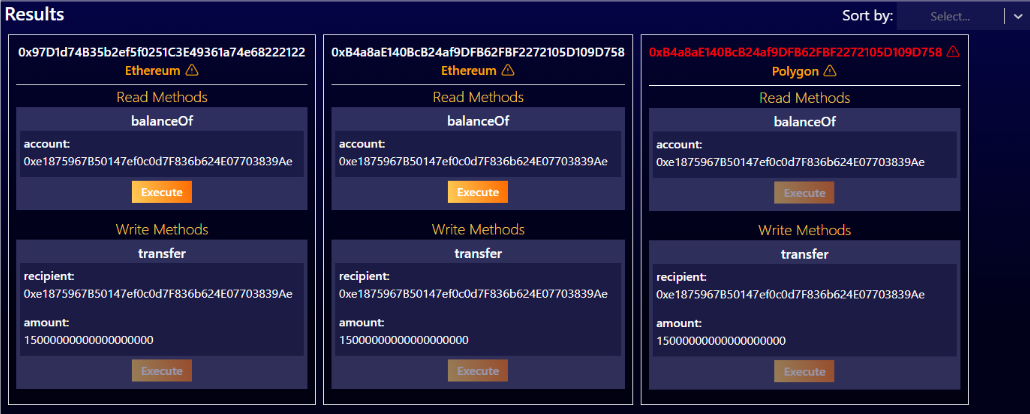
You can execute any single method, provided the connections are correct and, in the case of record methods, that your portfolio is connected and running on a matching network.
In the upper right corner of the results bar, you can choose to sort the results by address, network or method container nodes. You can also change the size of the results bar by dragging the top of the bar up or down to see more of the workspace or have more room to execute methods.